Backoffice
When logged in to the Umbraco backoffice, you'll find an overview of the site's content by clicking the "content" tab on the top of the page.

As an editor, this is where you will be able to control anything content-related on the site.
If you are an editor you will receive a designated area of responsibility, that will be your team's content.
The backoffice editing experience is built from a suite of components that allow you to customize your pages on a high level.
Using the backoffice
How to login to the Developer portal
The developer portal uses a CMS ("Content management system") called Umbraco. This means that you can log in to the backoffice of Developer portal and add new content which will be publised on the portal.
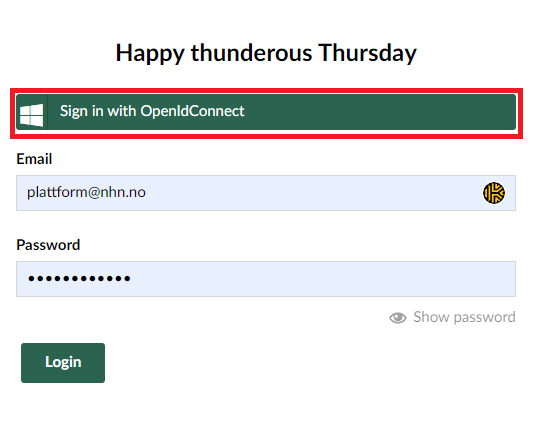
In order to do so, you will need access to the backoffice. We use a SSO ("single sign on solution") hooked up to NHN AD. That means you will need to be added to an AD group. Take contact to one in the Developer portal team in order to be added. Or ask in the Slack channel ("#nhn-dhp-team-plattform-utviklerportal"). When added to the group, you can sign in using the "Sign in with OpenIdConnect" button. This also means when users leave NHN, access will removed as part of the off boarding process in NHN AD. The backoffice is found here: https://utviklerportal.nhn.no/umbraco
Adding new content
Here we will cover the basic operations you can perform when logged into the backoffice, such as creating or editing content. A deep dive into what types of content you can create will be covered later on.
Adding new content in Umbraco is easy! If you hover over any content node on the left hand side, you will see "..." appearing next to it.
Clicking this button will show you an overview of the content types you are allowed to add under the selected node. Different node types (page, release notes, road map) will have different permissions as to what you may add as a child node.

Clicking any of the available node types will let you start editing immediately. Don't forget to save and / or publish your content!
Editing a content node
Editing a content node is done by filling out simple inputs with your data. In broader terms you will have access to regular inputs such as textboxes, toggle (yes/no), numeric and image picker.
First things first, on top of your content node you will see some tabs, here are the different categories of content you can input on your page.

The first tab in this case covers the actual content of you page, the content your end users will see. The other tabs cover how your page will be displayed on internal page listings (like the landing page), and how your page is indexed in both internal and external search engines, sitemap etc.
Inputs on these tabs will come with descriptions to better help you understand what they do and how they are utilized.
Saving and publishing content
At the bottom right of your screen you will see buttons named "Save" and "Save and publish".
The main difference between these two is that only saving your content will create a copy of your page in our database, your content will be stored there until you are ready to show it to the world. Only by clicking "Save and publish" however will your content be visible on the front-end of the site. Think of saving as saving a draft, while publishing is what pushes your content out for everyone to see.
Extras
If you right click a content node you will see some extra functions that are available to you. Here you will be able to move your content nodes around the content tree, sort child items under the clicked content node, delete the clicked content node and so on.

That covers the basics of the backoffice. Next up we'll take a look at all of the components that are available to you as an editor when adding content to your page!