Configure access to Patient Health Records in the HelseID self service portal
This guide will take you through how to configure access to Patient Health Records (Pasientens journaldokumenter) test environment, using the HelseID self service portal, available at selvbetjening.test.helseid
HelseID self service portal
For more information on the HelseID self service portal see their service documentation
For more information on the self service portal in the test environment and how to get access, see Selvbetjening i TEST
This guide will assume you have access to the HelseID self service portal in the test environment on behalf of the organization you represent (also referred to as a configuration owner).
Login and user configuration
You log in to the self service portal using your personal electronic id, for instance using ID-porten and BankID.
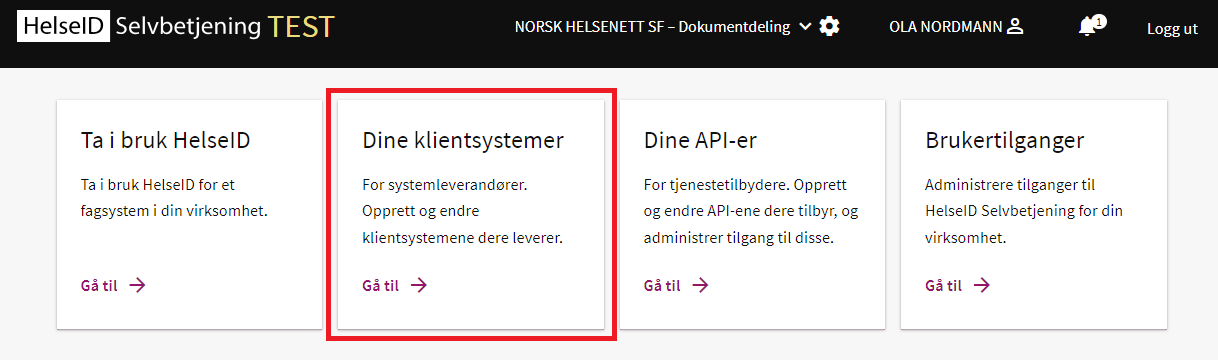
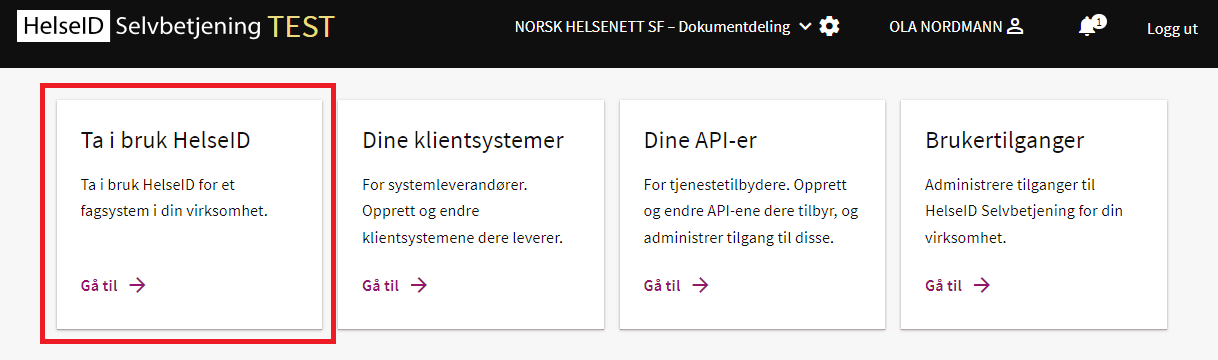
After identifying yourself using an electronic id, you should be able to see the front page. This page should contain some tiles you can select. In order to complete the setup for connecting to Pasientens journaldokumenter i kjernejournal (Patient Health Records), you should at least be able to see the "Ta i bruk HelseID" and the "Dine klientsystemer" tiles.
In the top right corner you should see your name, and which configuration owner you currently represent. If you represent multiple configuration owners, there should be a drop down menu with all available configuration owners. Select the configuration owner which is relevant for Pasientens journaldokumenter i kjernejournal. For more information, see the service documentation
Creating a new client system
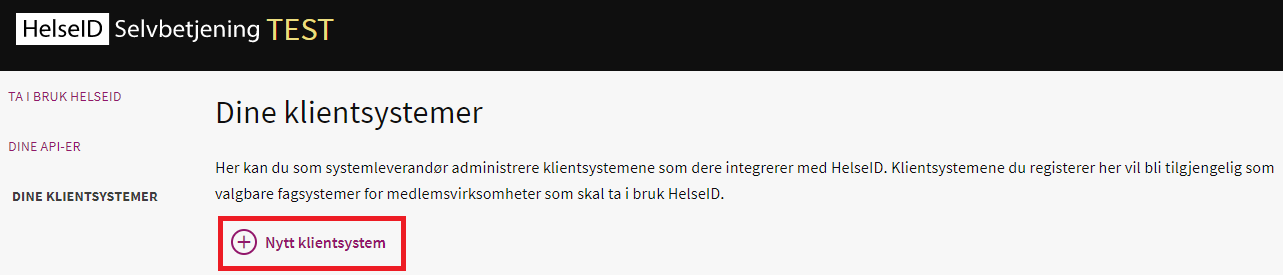
To get access to Pasientens journaldokumenter i kjernejournal test environment, you'll need to create a new client system.
In the self service portal front page, select the "Dine klientsystemer" tile.
Press the "Nytt klientsystem" button.
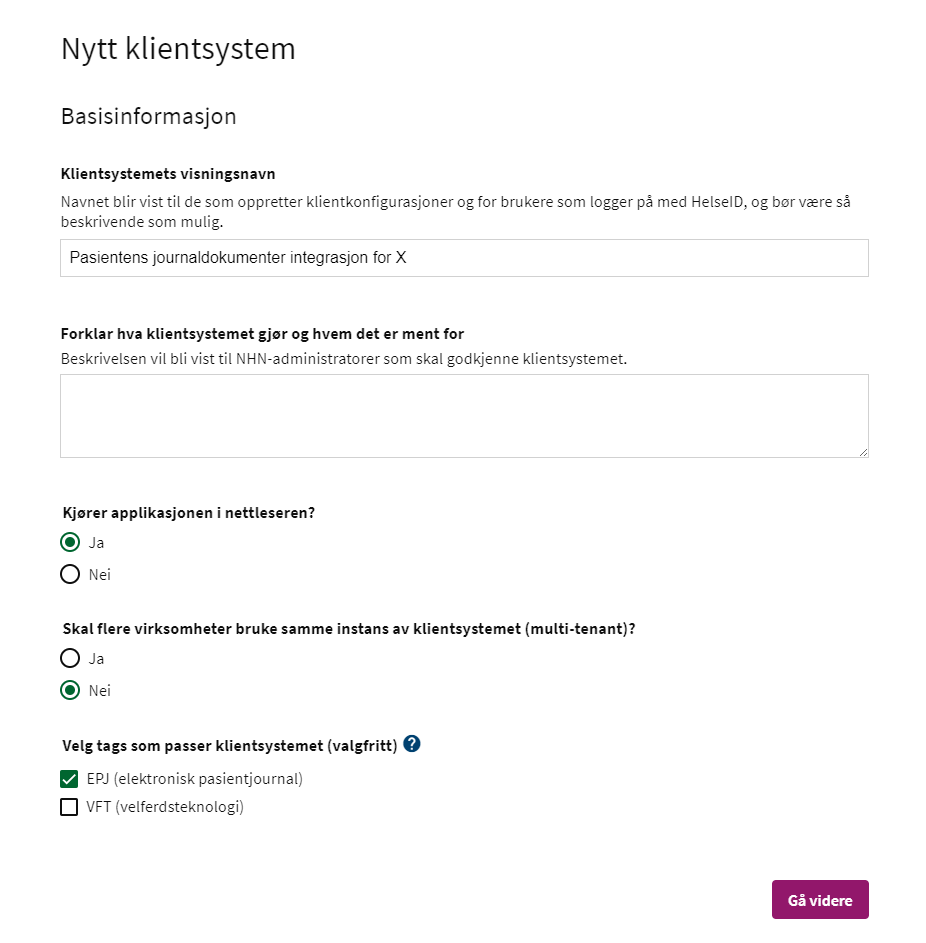
Fill in a suitable client system name, application type and system tags. It's mandatory to choose at least one tag, if nothing fits just select the one which seems most relevant for your system.
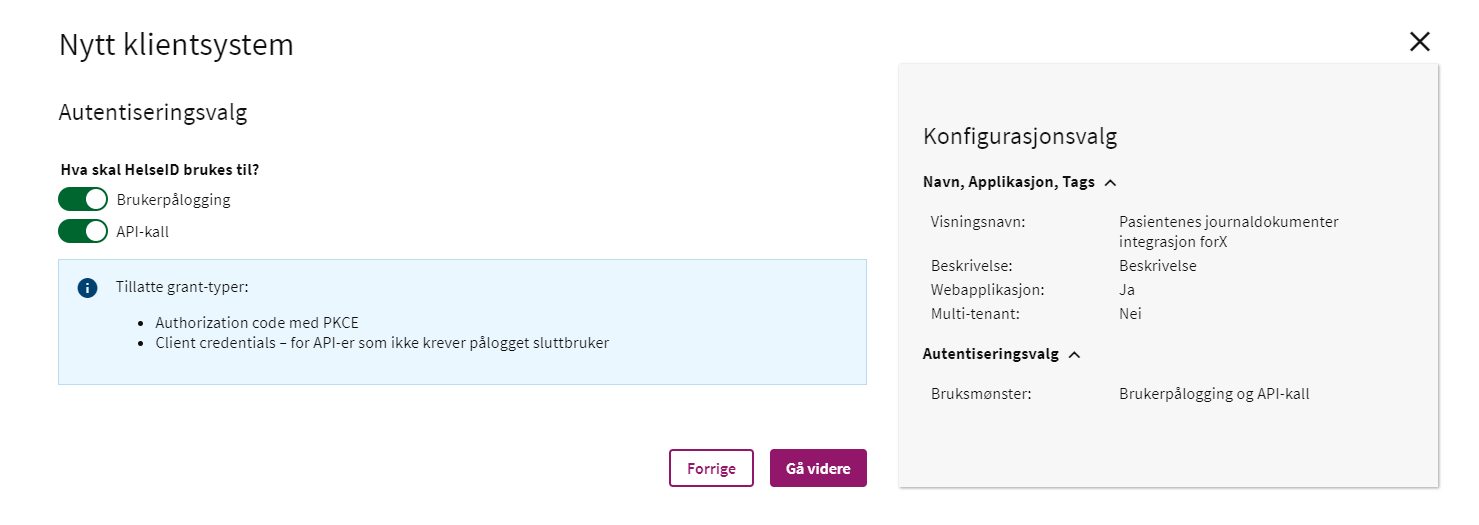
Choose how your application will authenticate with HelseID. In our case this is machine to machine authentication.
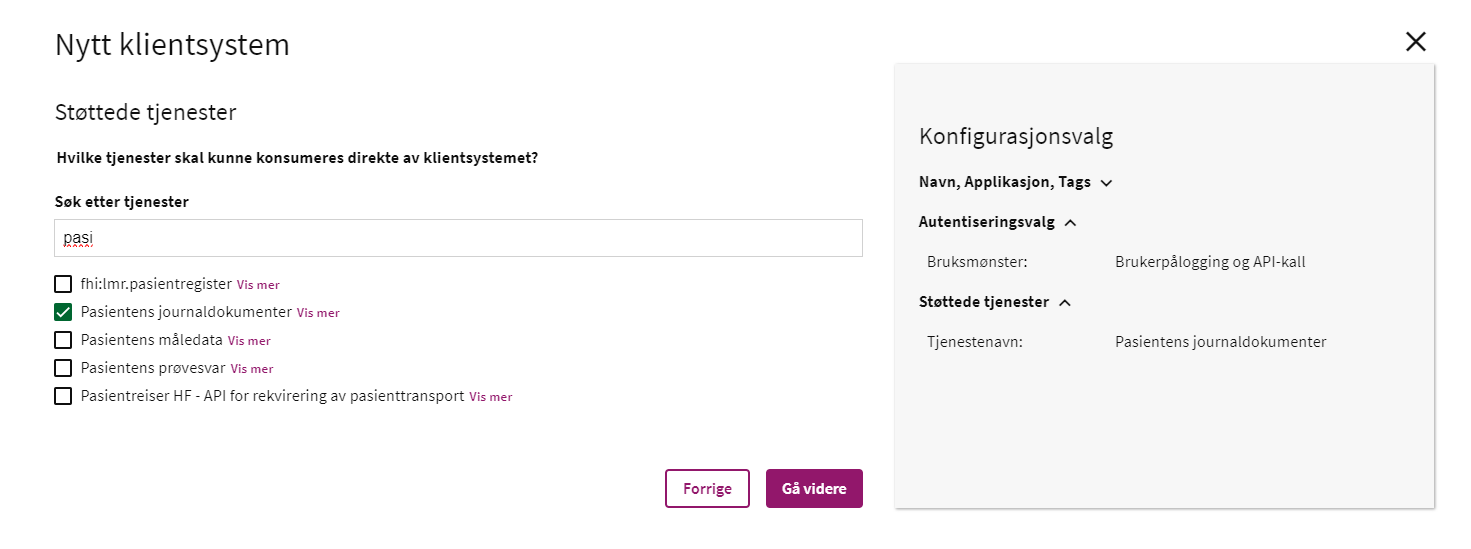
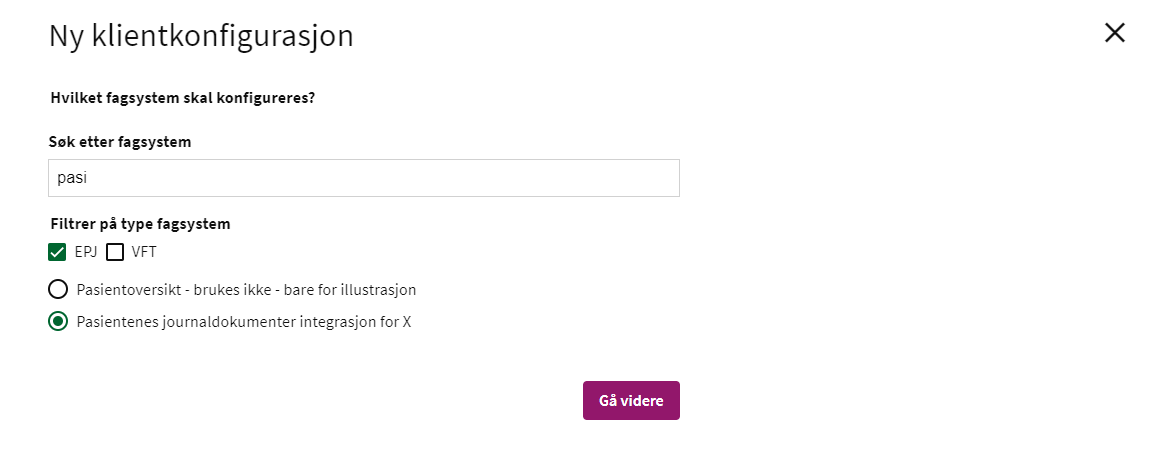
Choose which services your client system should be able to connect to. In our case, this is the "Pasientenes journaldokumenter".
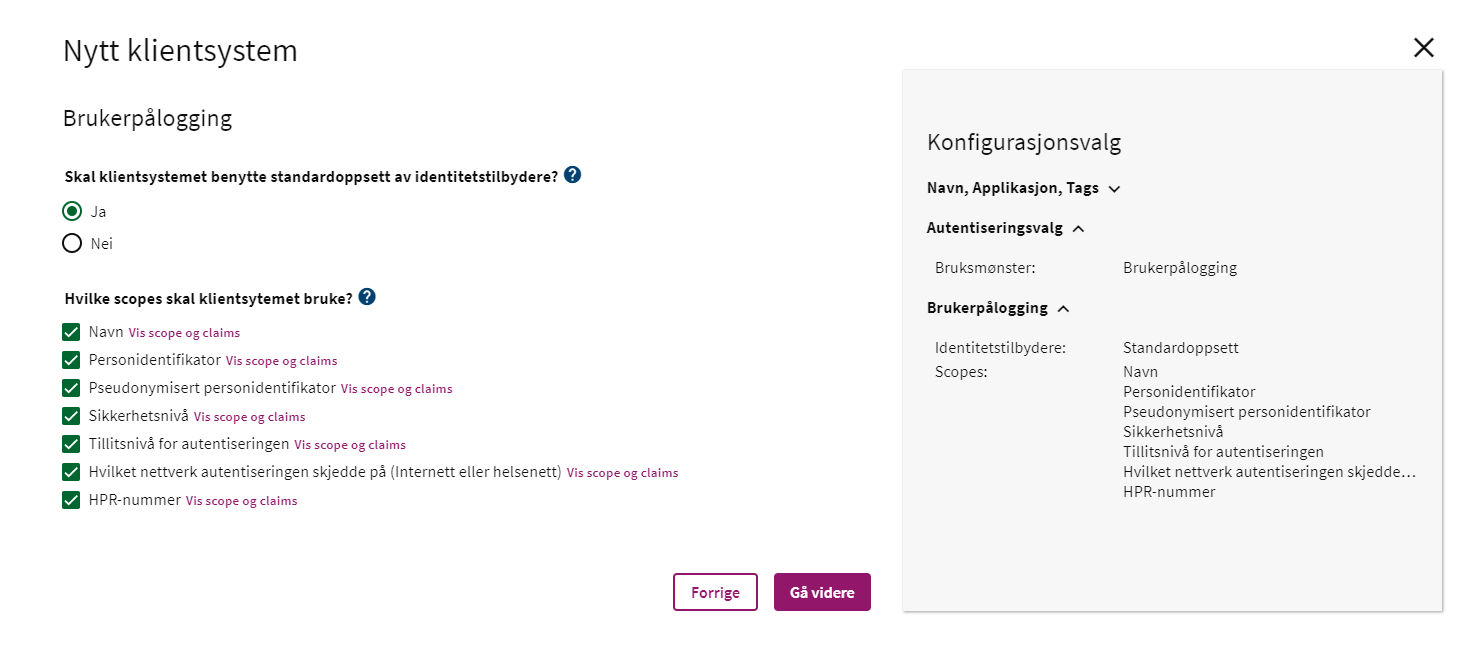
Choose settings and scopes for user logon in the client system. Denne informasjonen blir lagt inn i ID-tokenet, som er ment for intern bruk i klientsystemet, og skal ikke bli videresendt til eksterne tjenester. This information is added in the ID-token, which is meatn for internal use in the client system, and should not be forwarded to external services.
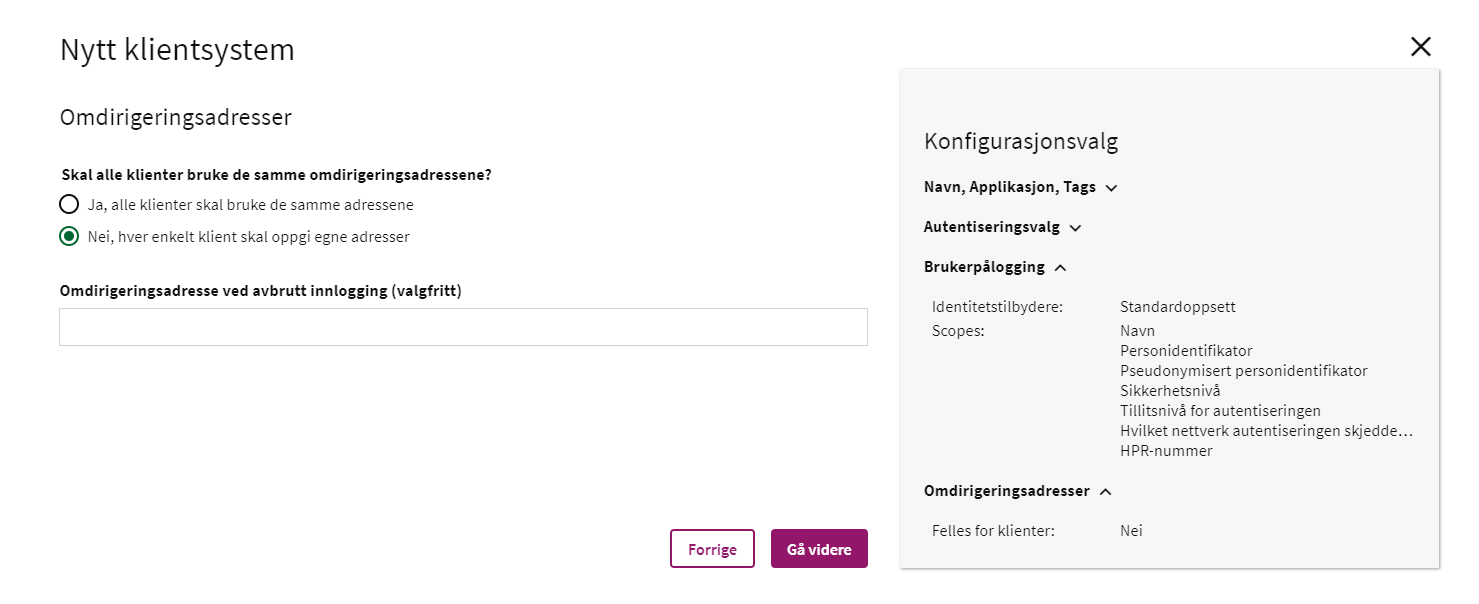
Choose redirect URLs for the client system.
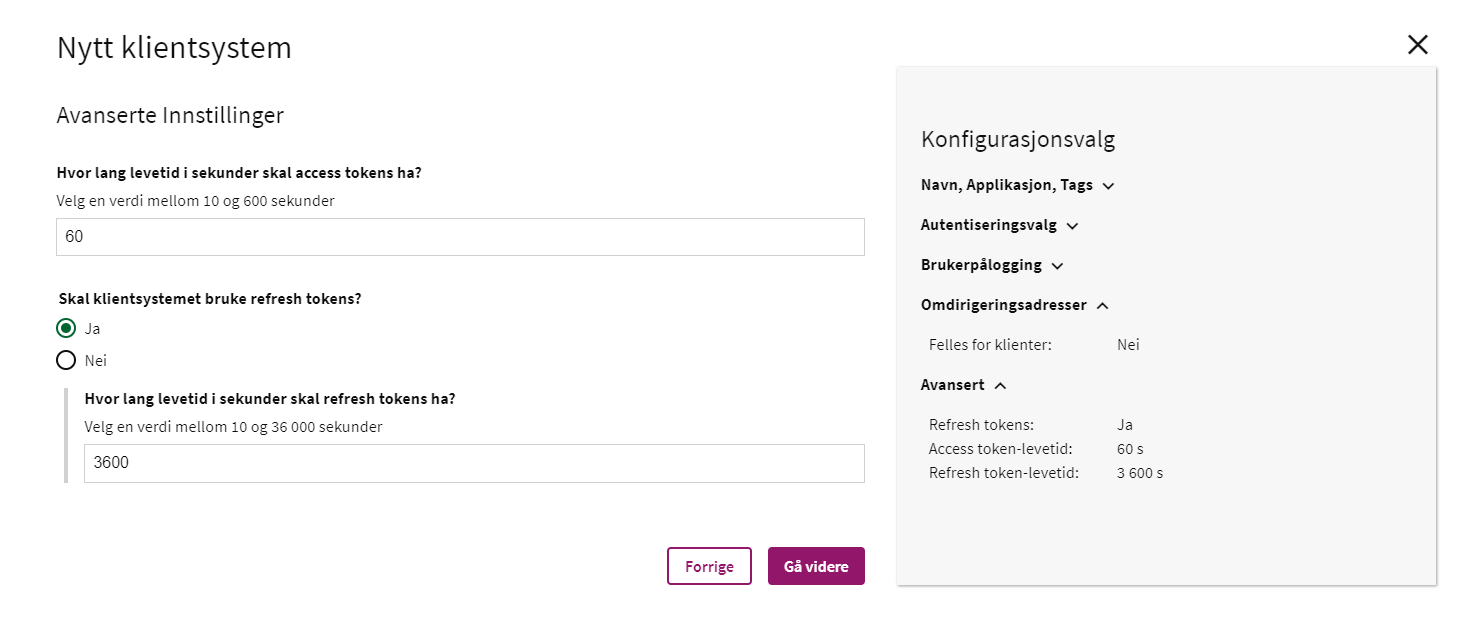
Choose a token lifetime. The default value of 60 seconds is a sensible value for machine to machine interaction. You may also choose to use refresh tokens and set their lifetime in seconds. The default of 3600 is a sensible value.
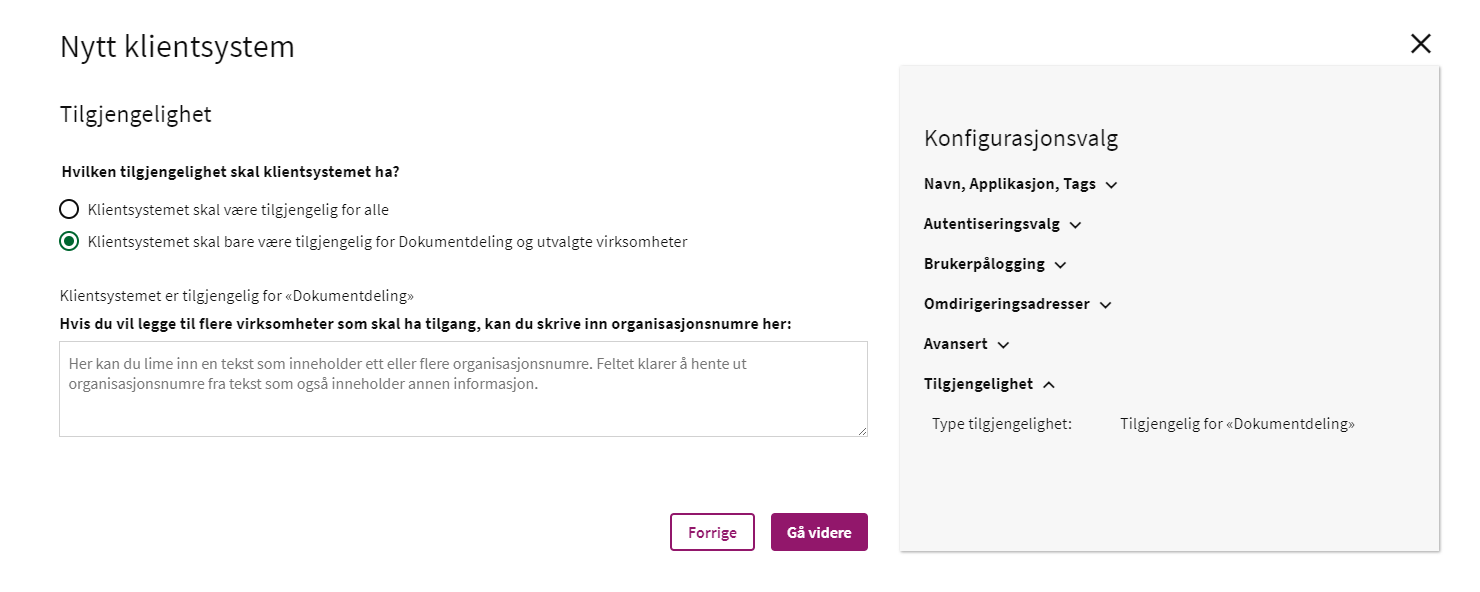
Choose which organizations the client system should be available for. Selecting the second option, "Klientsystemet skal bare være tilgjengelig for utvalgte virksomheter" will make the client system only available to your organization. It's also possible to add other specific organizations the client system should be available for, but this is not mandatory.
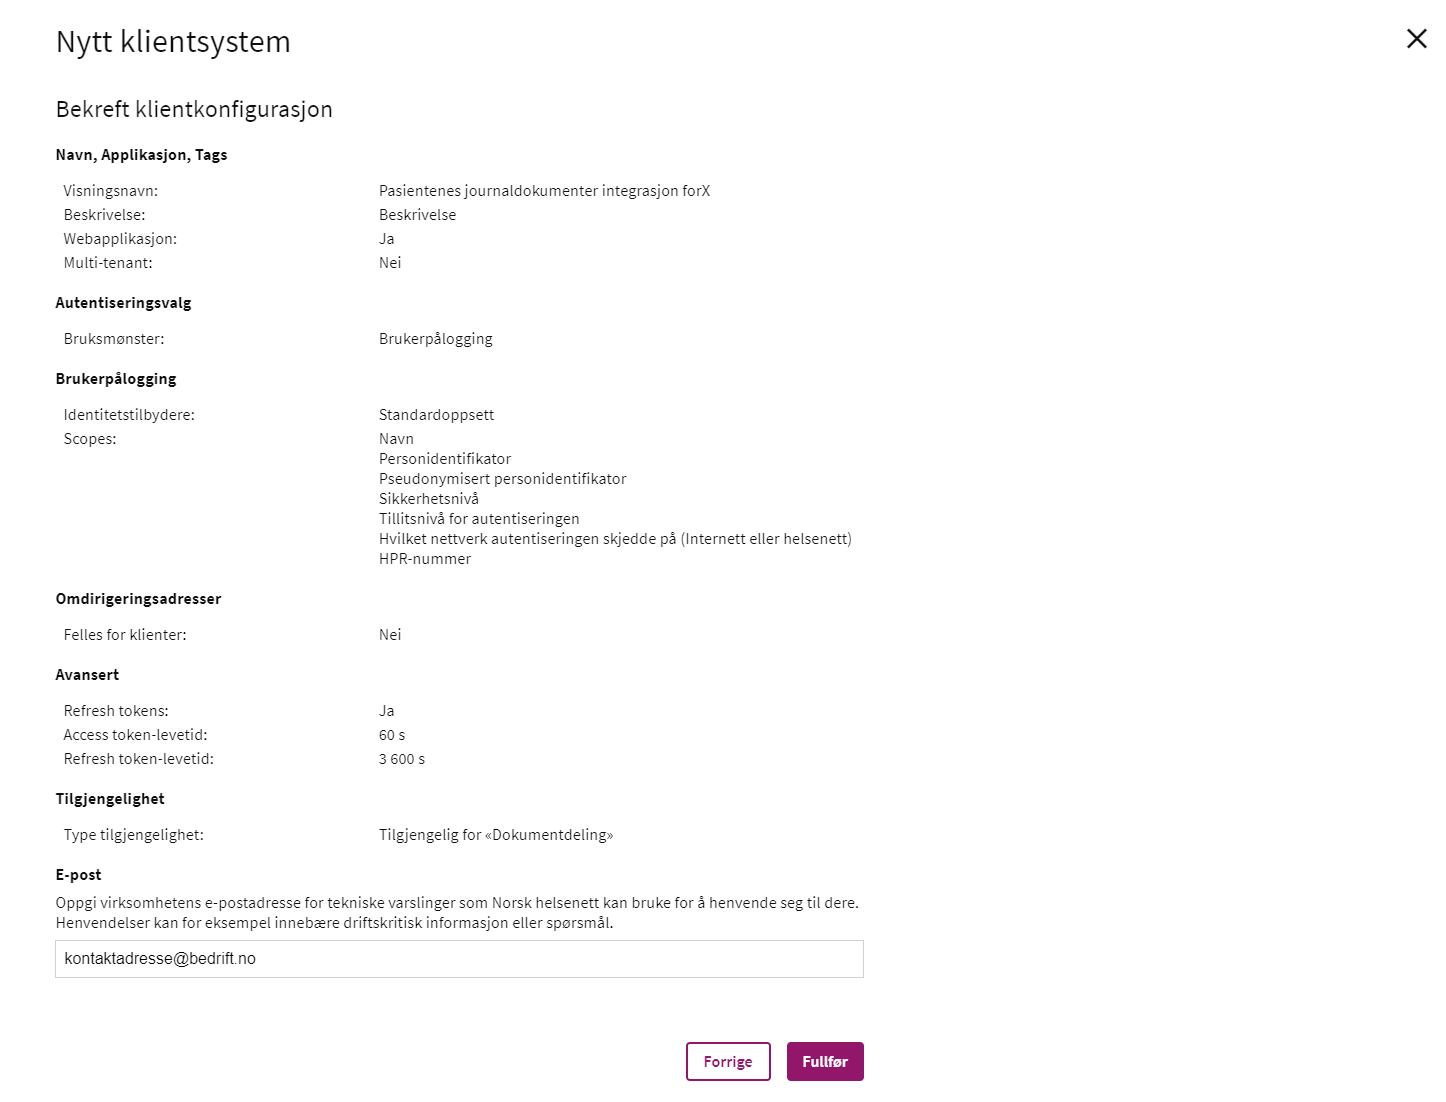
Confirm the configuration for the client system, and add a work e-mail as a contact for the client system.
You've now created a new client system, and specified that it should have access to Pasientens journaldokumenter i kjernejournal using machine to machine authentication. However, in order to get access to Pasientens journaldokumenter i kjernejournal, we first need to create a client configuration.
Creating a client configuration
Go back to the portal home page and select the "Ta i bruk HelseID" tile
Press the "Ny konfigurasjon" button to create a new client configuration
Find and select the client system you created previously
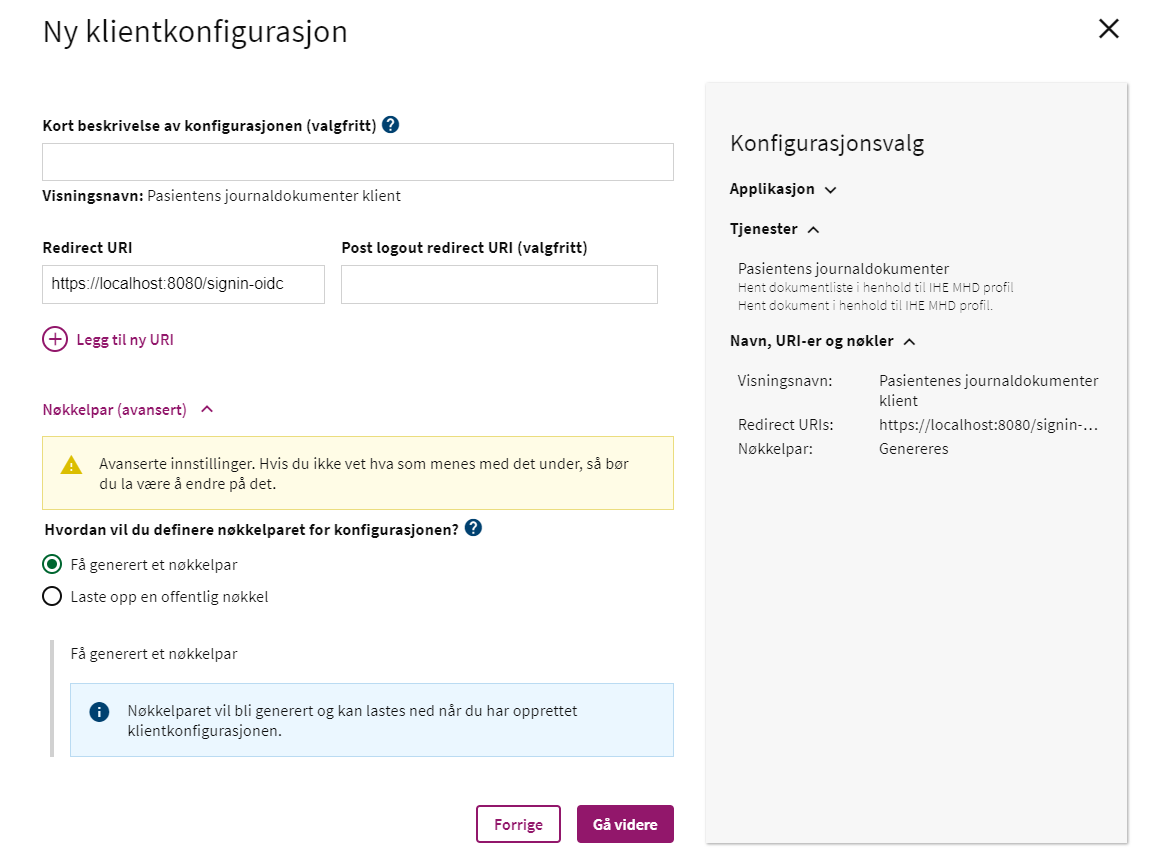
Select which services and scopes to use for this client configuration. In our case, select "Pasientenes journaldokumenter", which should be the only one available, and select the "Hent dokumentliste i henhold til IHE MHD profil" and/or the "Hent dokument i henhold til IHE MHD profil" scope(s).

A client configuration is identified with a public/private key pair. In this step you can choose which keypair you want to use. In our case we'd like HelseID to generate a keypair for us, so we'll select the "Få generert et nøkkelpar" option.
In the next step we can choose which organizational units should have access to the client configuration. This step is not relevant for this guide, so just skip to the next step.
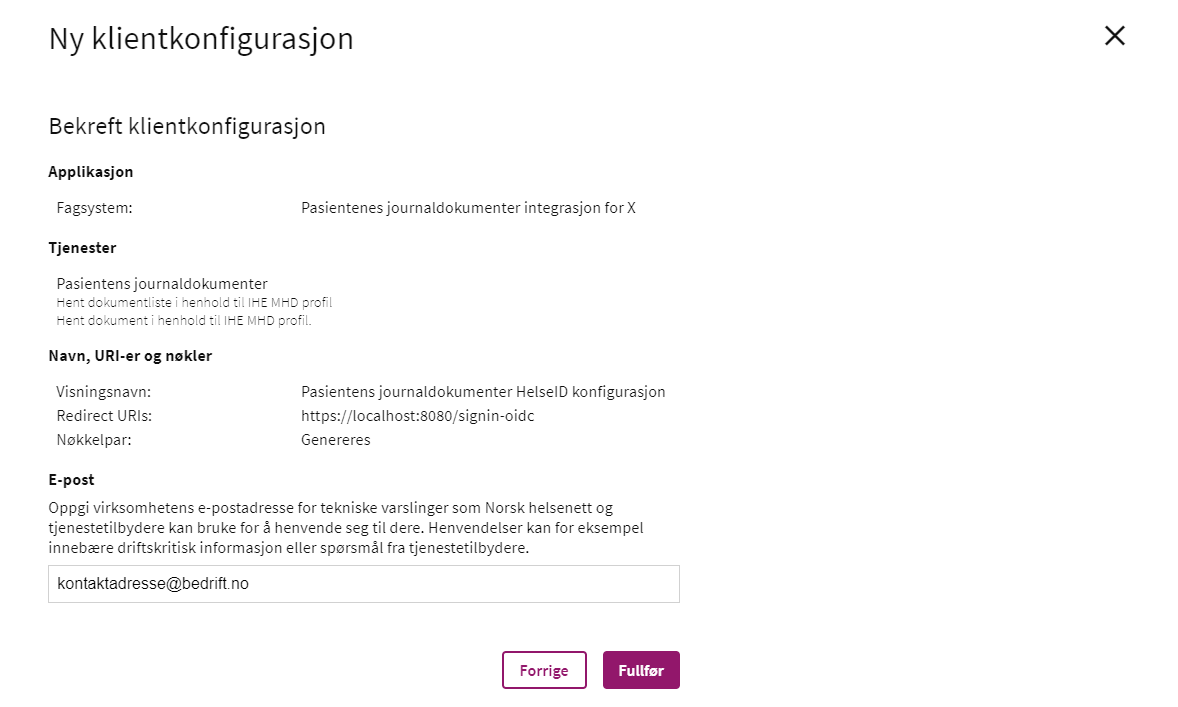
Confirm the client configuration, and add a work e-mail as a contact for the client configuration. What's important to note in this step is that the client configuration still needs to be approved before it can be used to access Pasientens journaldokumenter.
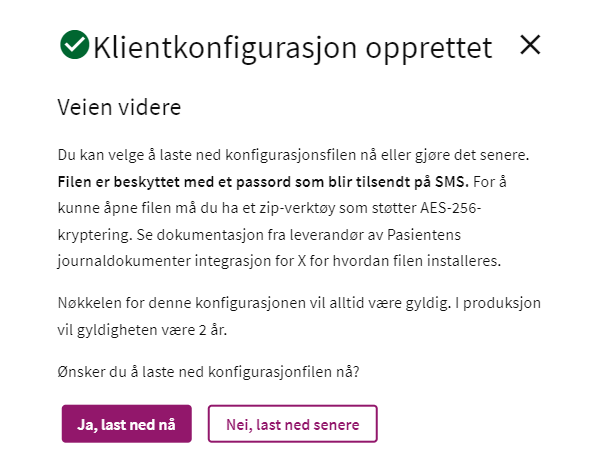
After the configuration is created, you'll get the option to download a configuration file containing the client id and private key you'll need to use to exchange a valid HelseID token with access to Pasientens journaldokumenter.
Congratulations! You've successfully created a client system and a client configuration for your system with access to Pasientens journaldokumenter i kjernejournal with HelseID.
Next steps
The next step to start testing Pasientens journaldokumenter i kjernejournal is to implement an API client which is able to exchange a HelseID token using the client configuration created in this guide and use this token when making requests to the Pasientens journaldokumenter i kjernejournal API.